How to install AWS EC2 Instance

Hello! I am pranjali. I write about Cloud & DevOps.
Getting Started With Amazon
Amazon Elastic Compute Cloud (Amazon EC2) is a core component of Amazon Web Services (AWS), providing scalable and flexible virtual server instances in the cloud.
1. Sign Up for AWS
If you're new to AWS, the first step is to create an AWS account.
Visit this link and click on "Create an AWS Account" to begin the registration process. Follow the instructions and provide the necessary information to set up your account.
2. Access the AWS Management Console
Once your AWS account is ready, log in to the AWS Management Console. This is your centralized dashboard to manage various AWS services, including EC2.

3. Launching an EC2 Instance
To launch your first EC2 instance, follow these simple steps:
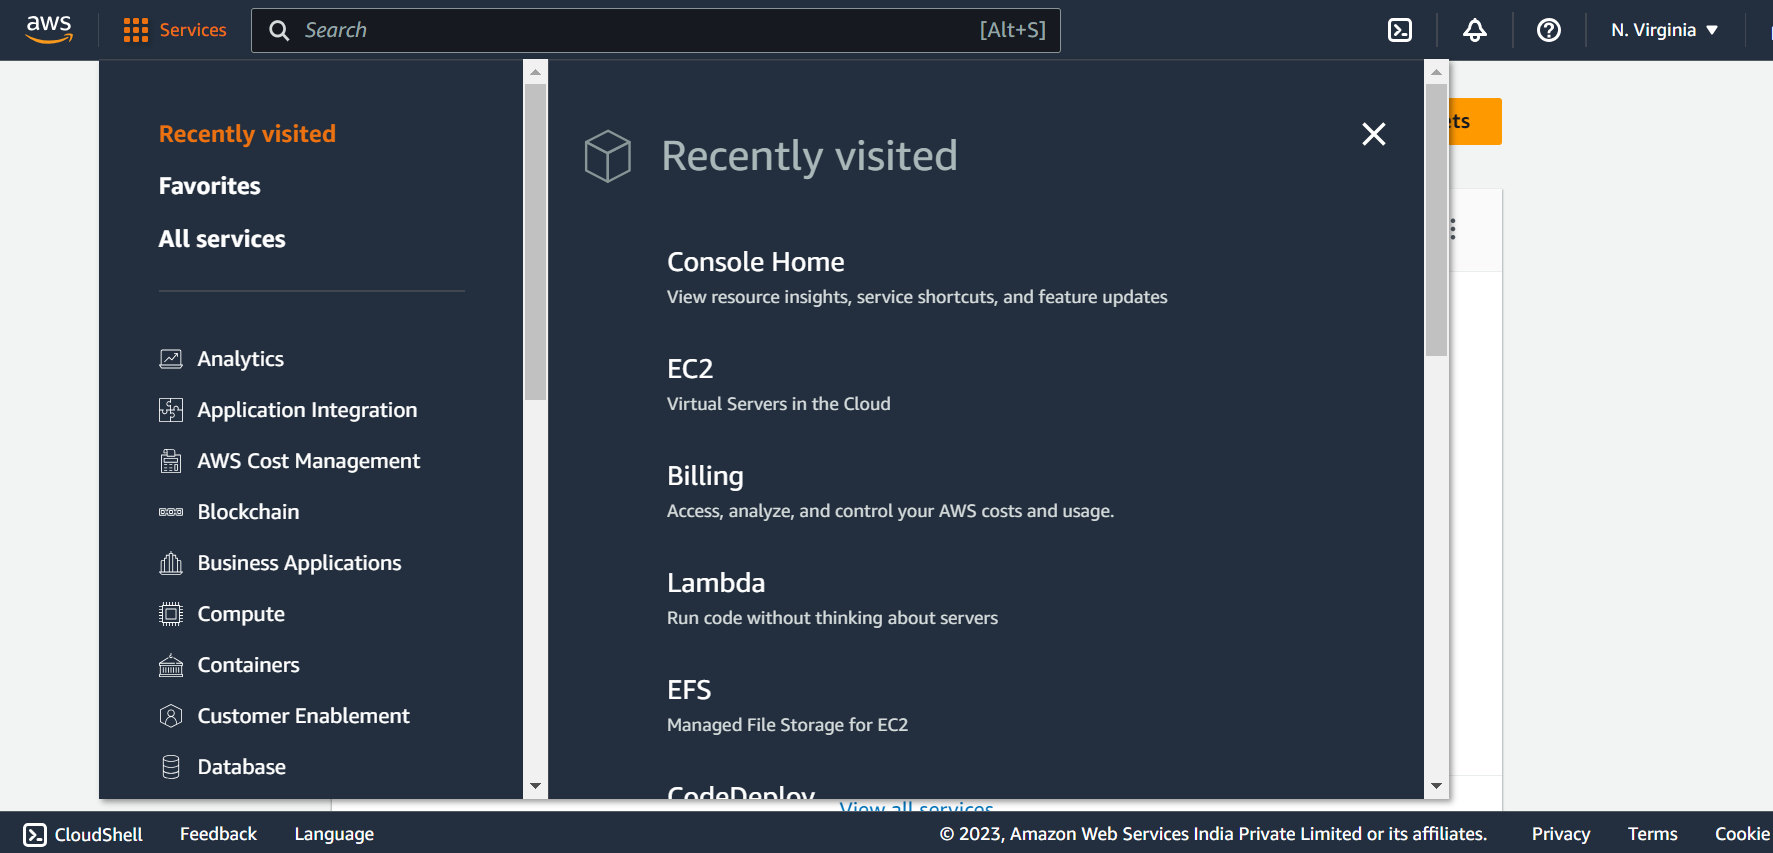
Step A: Go to the EC2 Dashboard
From the AWS Management Console, navigate to the EC2 Dashboard by clicking on "Services" in the top menu, and then selecting "EC2" under "Compute."
Step B: Launch an Instance
Click on the "Instances" link in the left sidebar and then click the "Launch Instance" button.

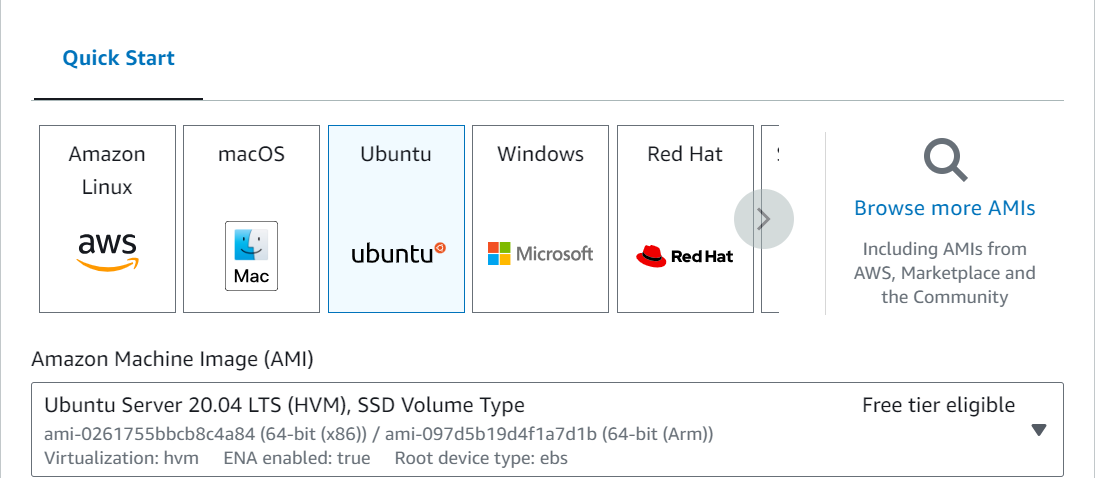
Step C: Choose an Amazon Machine Image (AMI)
Select an AMI, which is a pre-configured operating system and software stack. You can choose from a wide range of AMIs, including various Linux distributions, Windows servers, and specialized images.
Here I am choosing Ubuntu:
Step D: Choose an Instance Type
Select the instance type based on your application's resource requirements. EC2 offers a variety of instance types with different combinations of CPU, memory, and storage.

Step E: Configure Instance Details
Configure additional details, such as the number of instances to launch, network settings, and storage options.
Step F: Add Storage
Specify the storage size and type for your instance. You can also add additional volumes if needed.
Step G: Add Tags
Tags help you organize and categorize your EC2 instances for easier management.

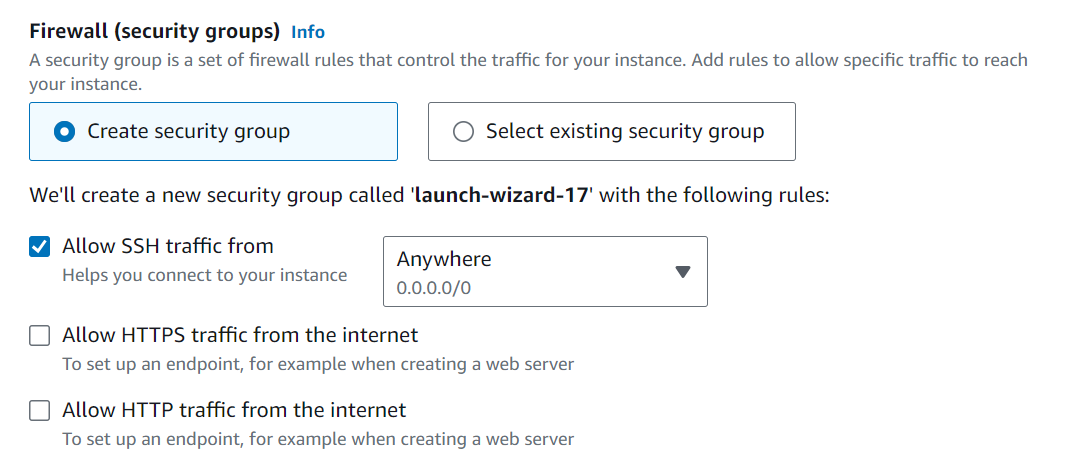
Step H: Configure Security Group
A security group acts as a virtual firewall, controlling inbound and outbound traffic to your instance. Create a new security group or select an existing one.
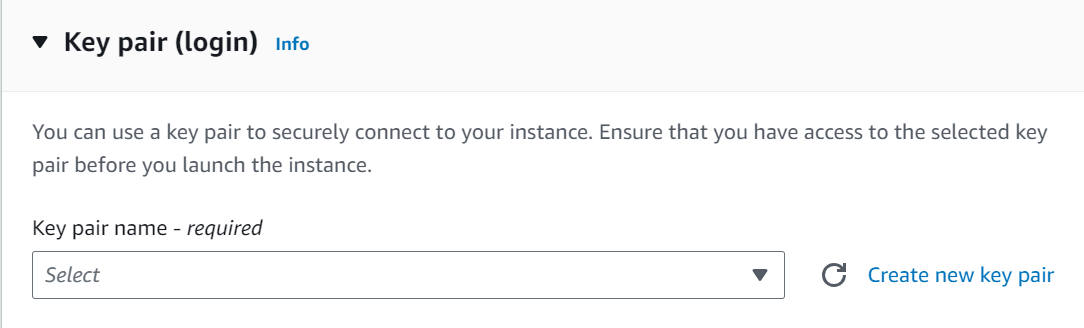
Step I: Choose a Key Pair
Select an existing key pair or create a new one. This key pair will be used to securely connect to your EC2 instance.
Step J: Review and Launch
Review your configuration settings and click the "Launch" button.

Step K: Launching
Click "Launch Instances," and your EC2 instance will start launching.
4. Connect to Your EC2 Instance
Once your EC2 instance is up and running, you can connect to it using SSH (for Linux instances) or Remote Desktop (for Windows instances) using the key pair you selected during the instance launch.
Wohoooo! You've taken your first steps into the world of Amazon EC2. You now have a virtual server running in the AWS cloud, ready to host your applications and services.
keep experimenting and learning, and enjoy your cloud computing journey!
